1. Guide Overview
This guide is for first-time AgentVis users. It takes the app from "just installed" to "ready for stable Agent work".
Recommended order:
- Follow the onboarding flow to configure API keys, cloud services, and preset Skill dependencies.
- Confirm that the default model, Embedding service, and Memory System LLM are configured.
- Add Tavily search, image generation, protected paths, and data backup settings as needed.
- Check dependencies for commonly used Skills, especially browser automation and office-document Skills.
- Create an Agent and configure Rules, Knowledge, Scheduled Tasks, and workspace files.
- Run one trial task to confirm the Agent can call the LLM and execute normally.
If you want to start quickly, prioritize sections 2, 3, 4, 7, and 10. The rest can be completed gradually.
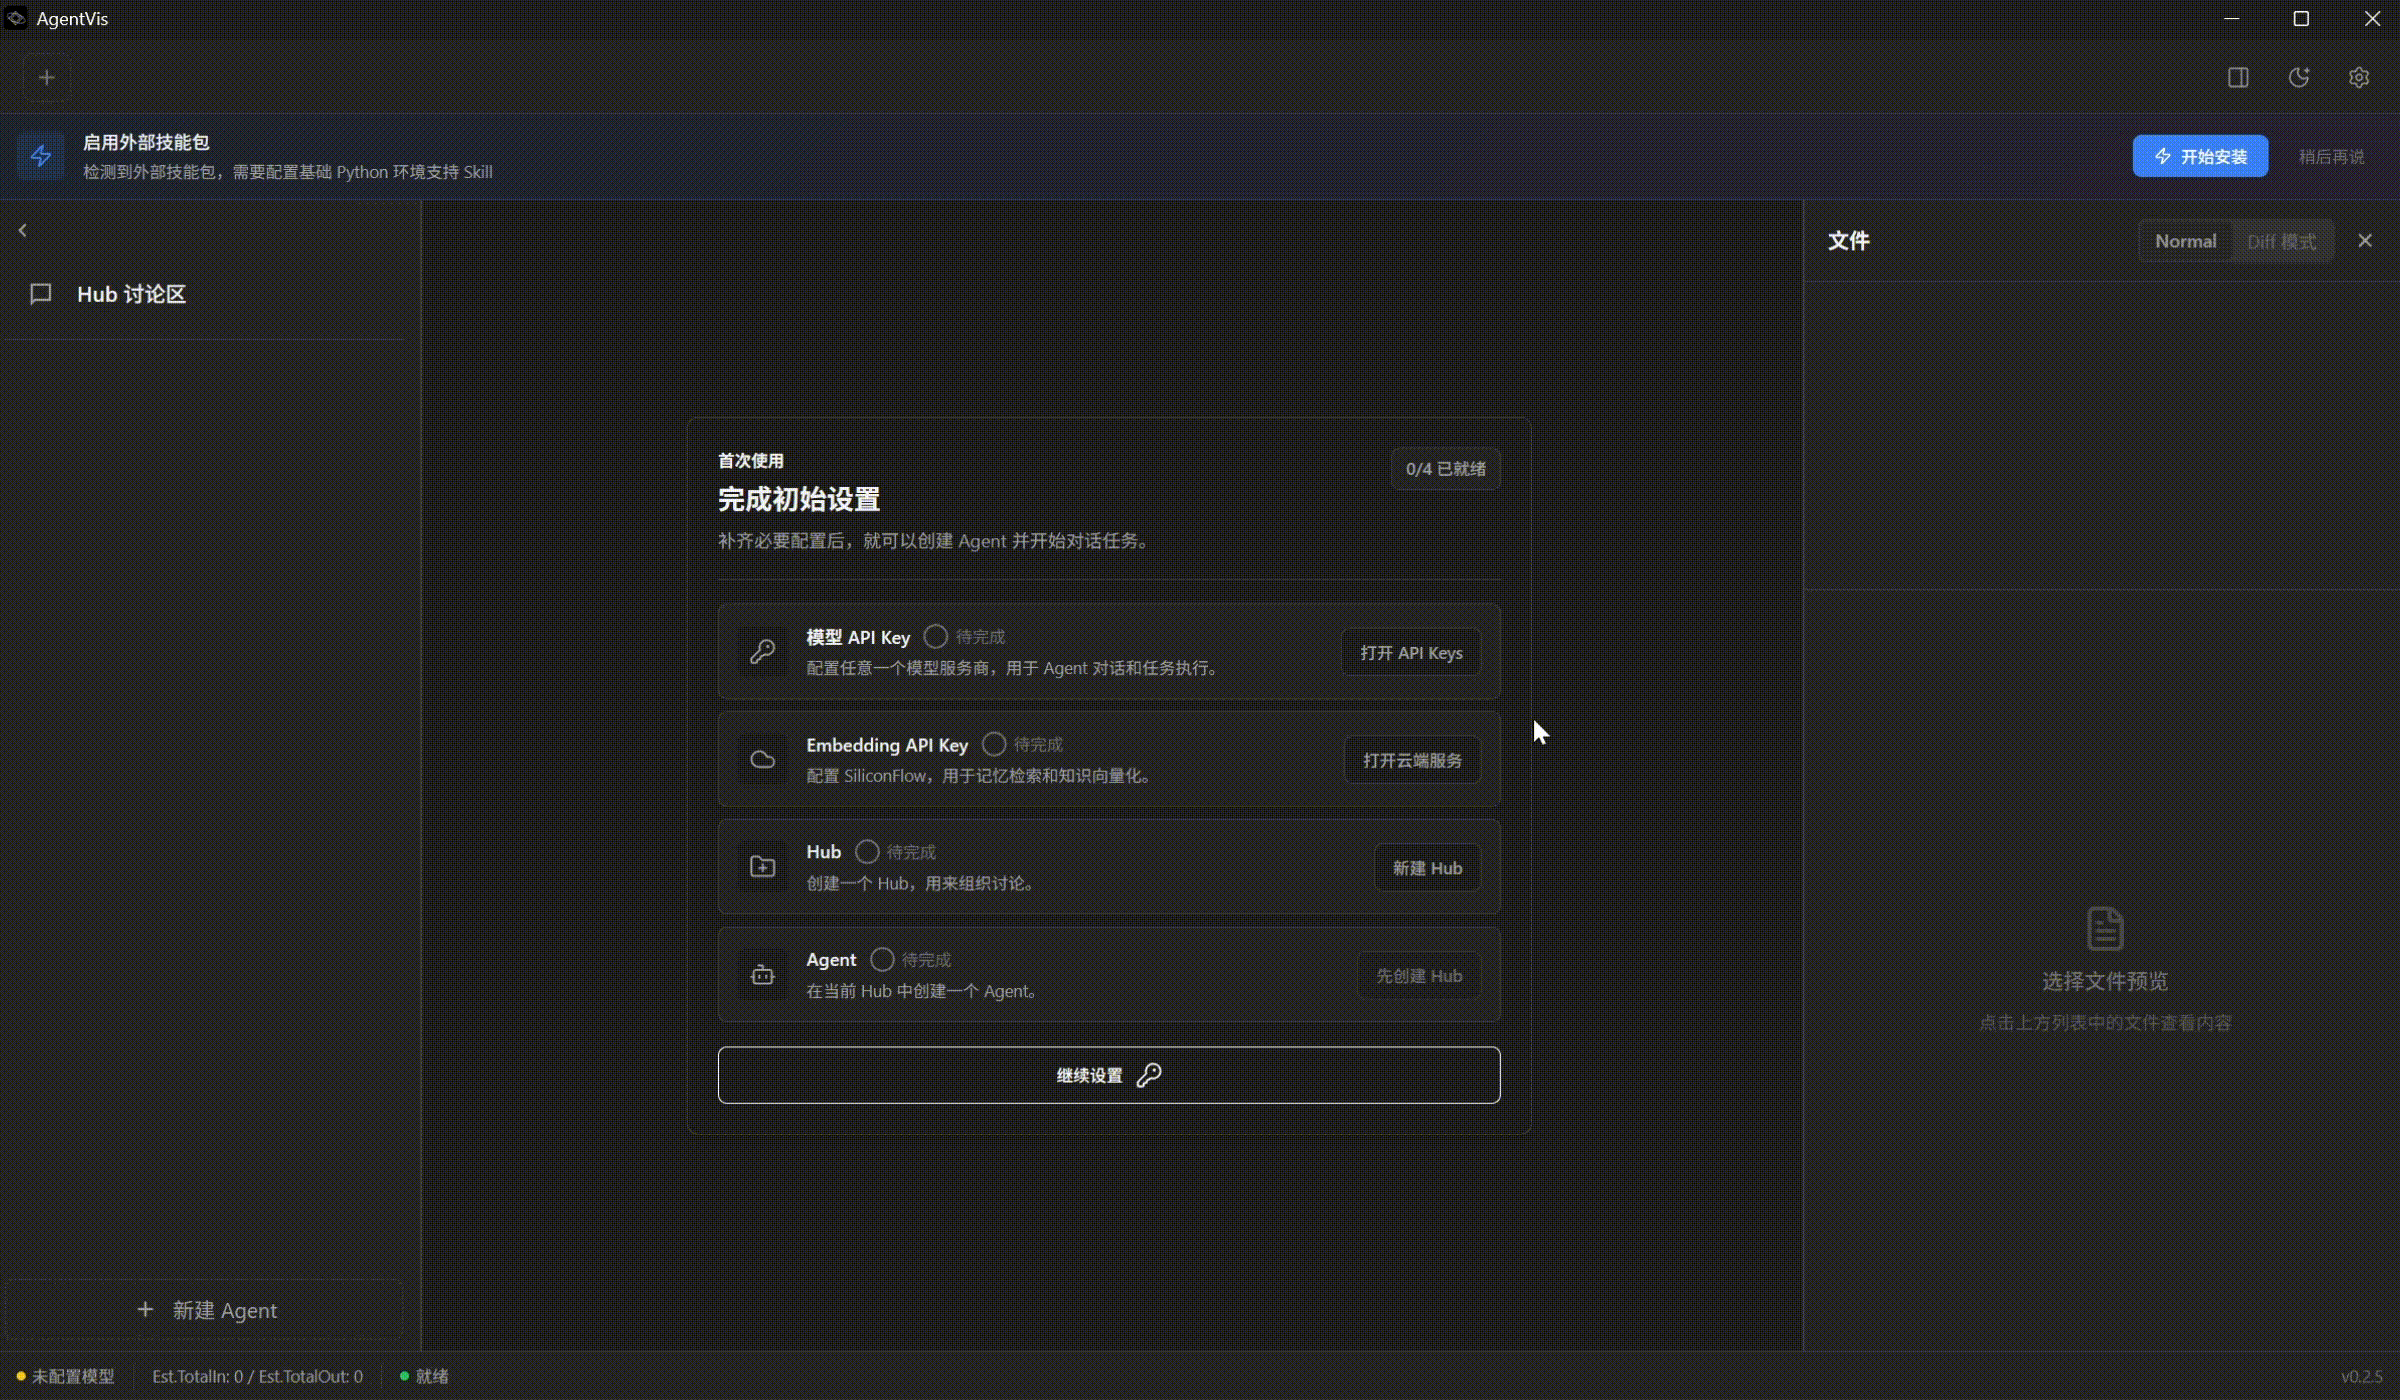
2. Complete Initial Setup
On first launch, AgentVis shows a "Complete Initial Setup" guide. It opens "Settings -> API Keys" and "Settings -> Cloud Services", then prompts you to install Python dependencies required by preset Skills.
2.1 Configure API Keys
Open "Settings -> API Keys" and configure the model provider you want to use for Agents. Common providers only require their API key.
If you use a custom compatible API, relay service, or private gateway, use the local provider. It is designed for custom endpoints compatible with OpenAI, Anthropic, or Gemini protocols.
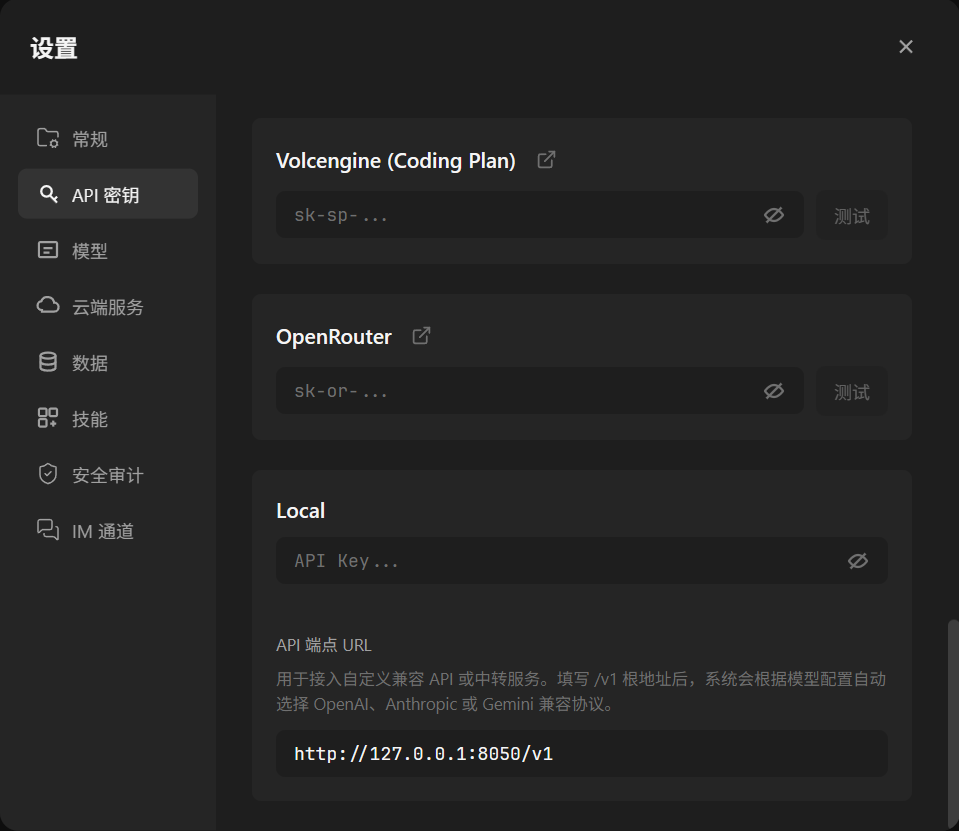
local provider can connect custom compatible APIs or relay services.2.2 Configure Cloud Services
Open "Settings -> Cloud Services" and configure at least the Embedding provider key and Memory System LLM. We also recommend adding a Tavily key so Agents can use web search more reliably for public information.
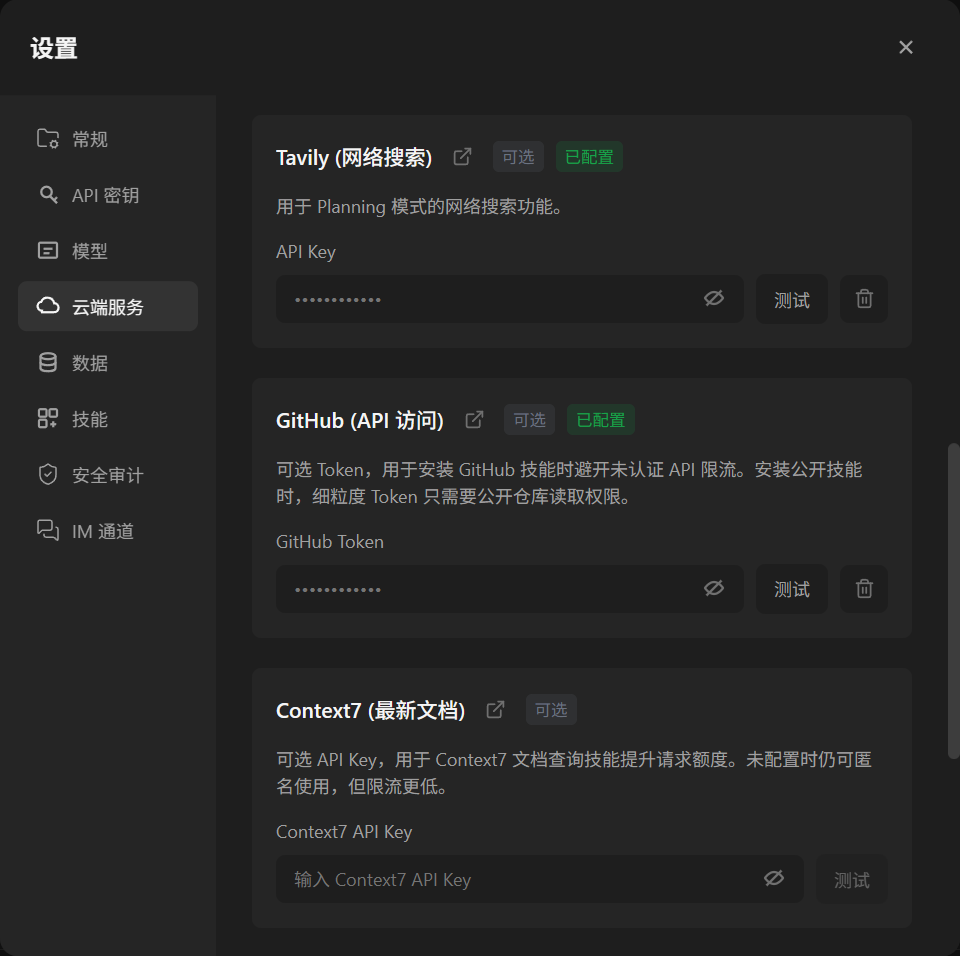
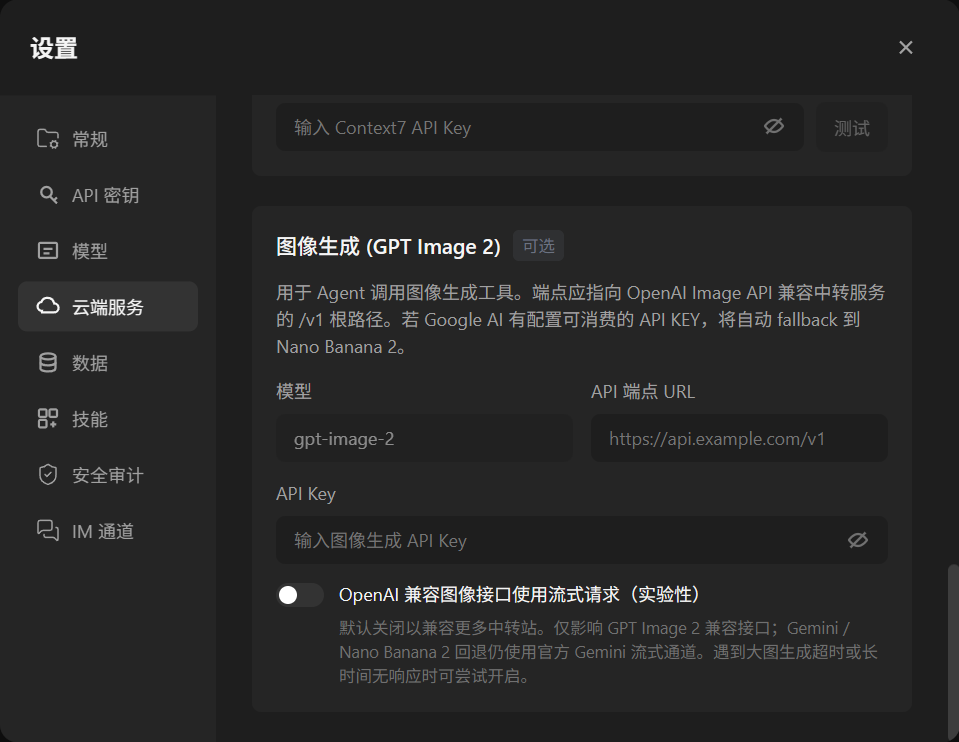
Image generation is not required for initial use. Configure it only if you want Agents to generate images, posters, or visual assets directly.
2.3 Install Preset Skill Dependencies
The top of the initial setup guide provides a button to install Python dependencies for preset Skills. Click it and wait for completion; some built-in Skills need these dependencies for full functionality.
Dependency installation may take a while. If it fails due to network issues, retry it, or later click Refresh List in "Settings -> Skills" to re-detect and install dependencies. Do not close the app during installation; create or use Agents after it completes.
3. Set the Default Model and Manage Models
Open "Settings -> Models" and choose the default provider and model. This default is used when creating new Agents and for security review during Skill installation or import.
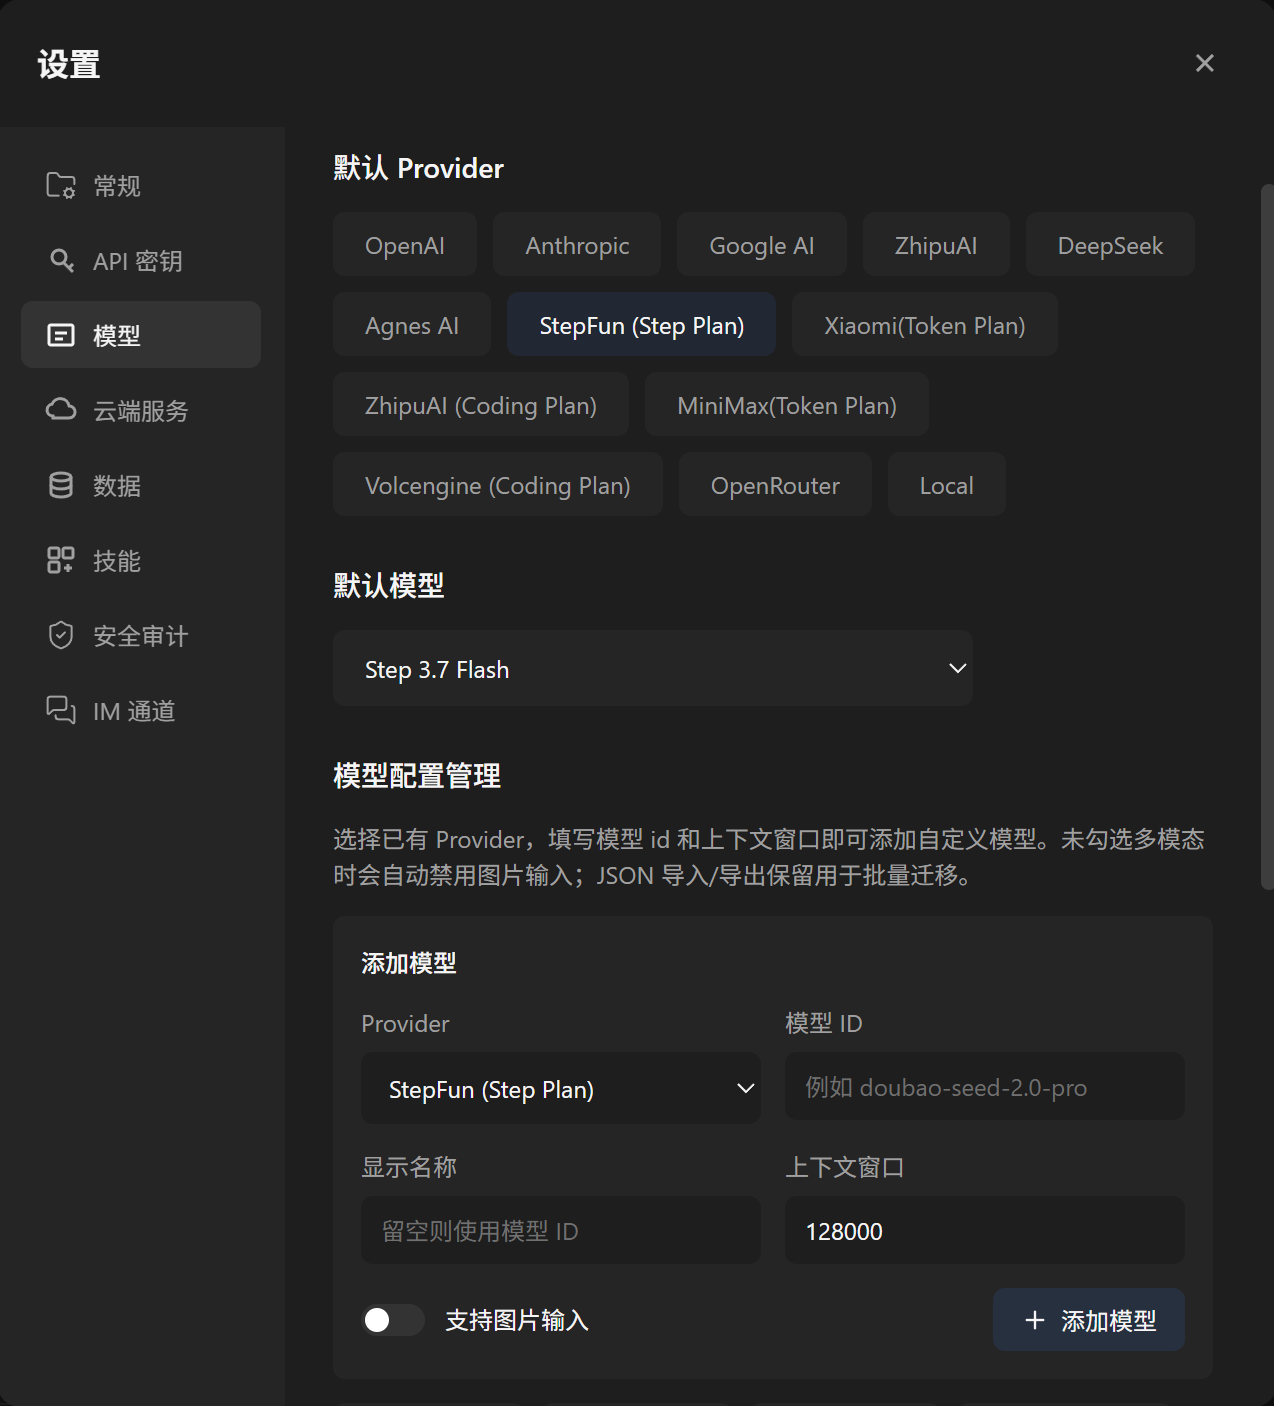
You can add models under existing providers yourself, or provide the model name, API endpoint, protocol type, and related details so an Agent can use the built-in model-config Skill to add or adjust model settings.
For first use, choose a stable primary model with suitable response speed. After the basic workflow works, configure different models for different Agents.
4. Configure Protected Paths, Trash Bin, and Data Backup
AgentVis lets Agents read and write local files, run commands, and work on projects, so set basic security boundaries and data backup before using real projects.
4.1 Custom Protected Paths and Trash Bin
Open "Settings -> General" to add custom protected paths. Protected paths receive extra safeguards during file operations and command execution, reducing the risk of accidentally deleting or modifying important directories.
Files deleted by Agents go to AgentVis Trash Bin. You can open the Trash Bin folder from "Settings -> General" to inspect or restore files, and periodically clean redundant screenshots or temporary files deleted after Agent tasks.
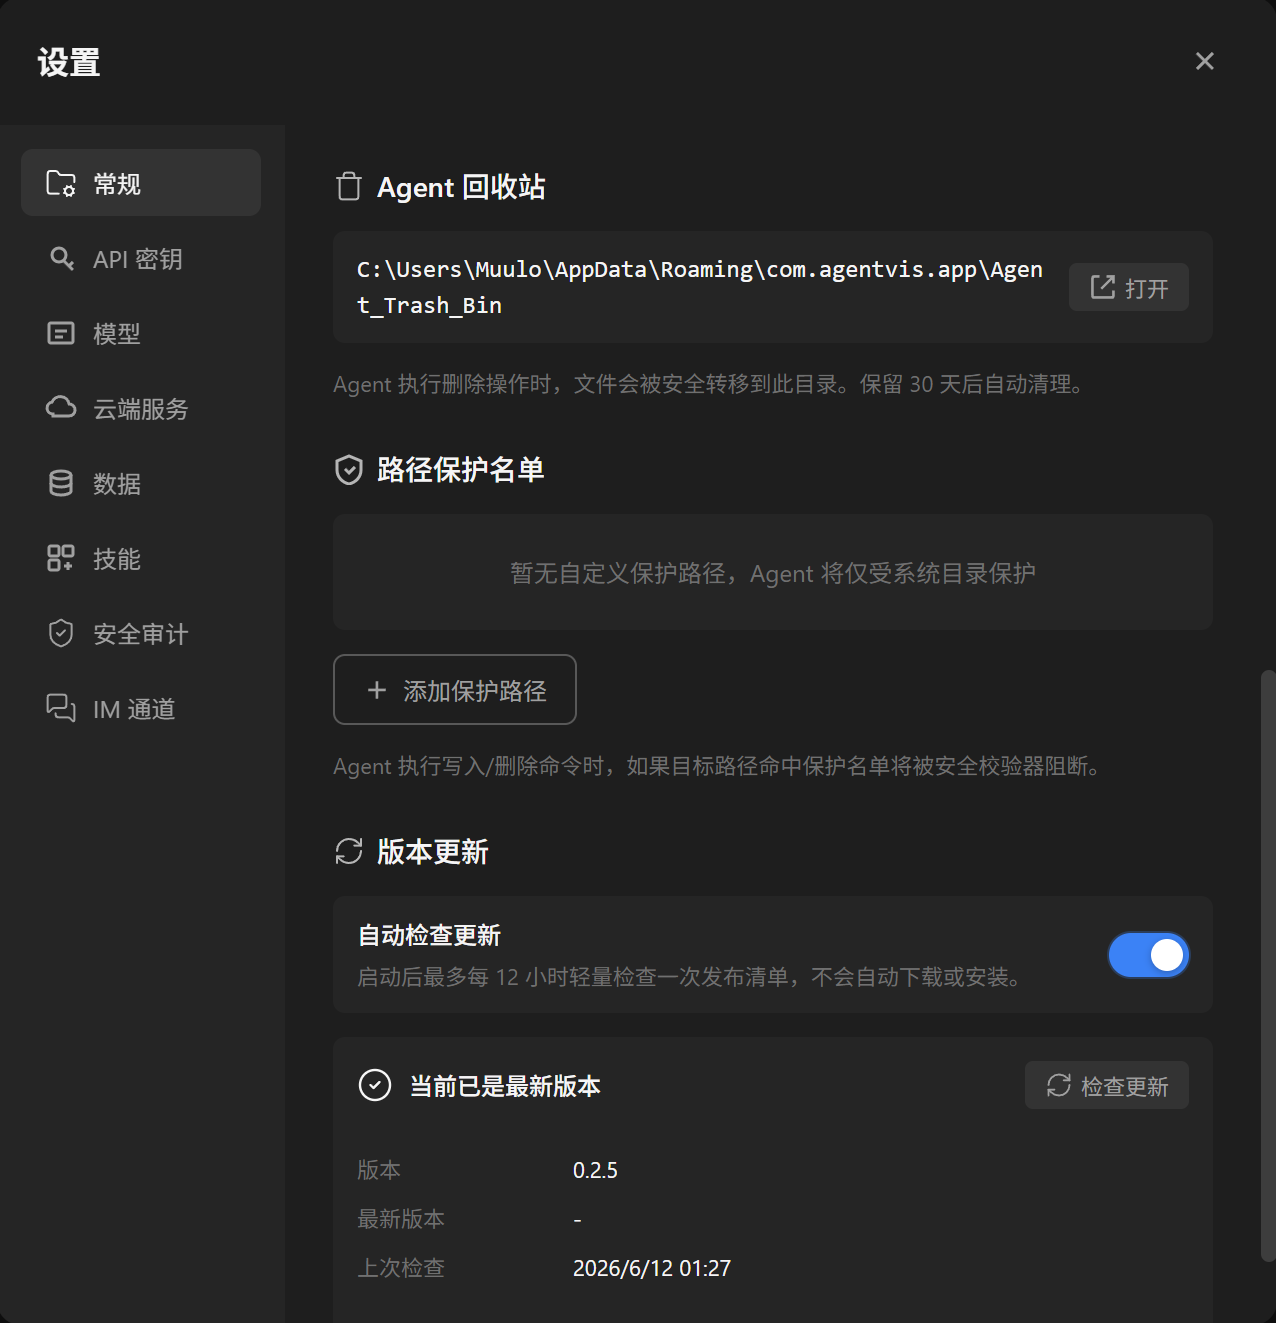
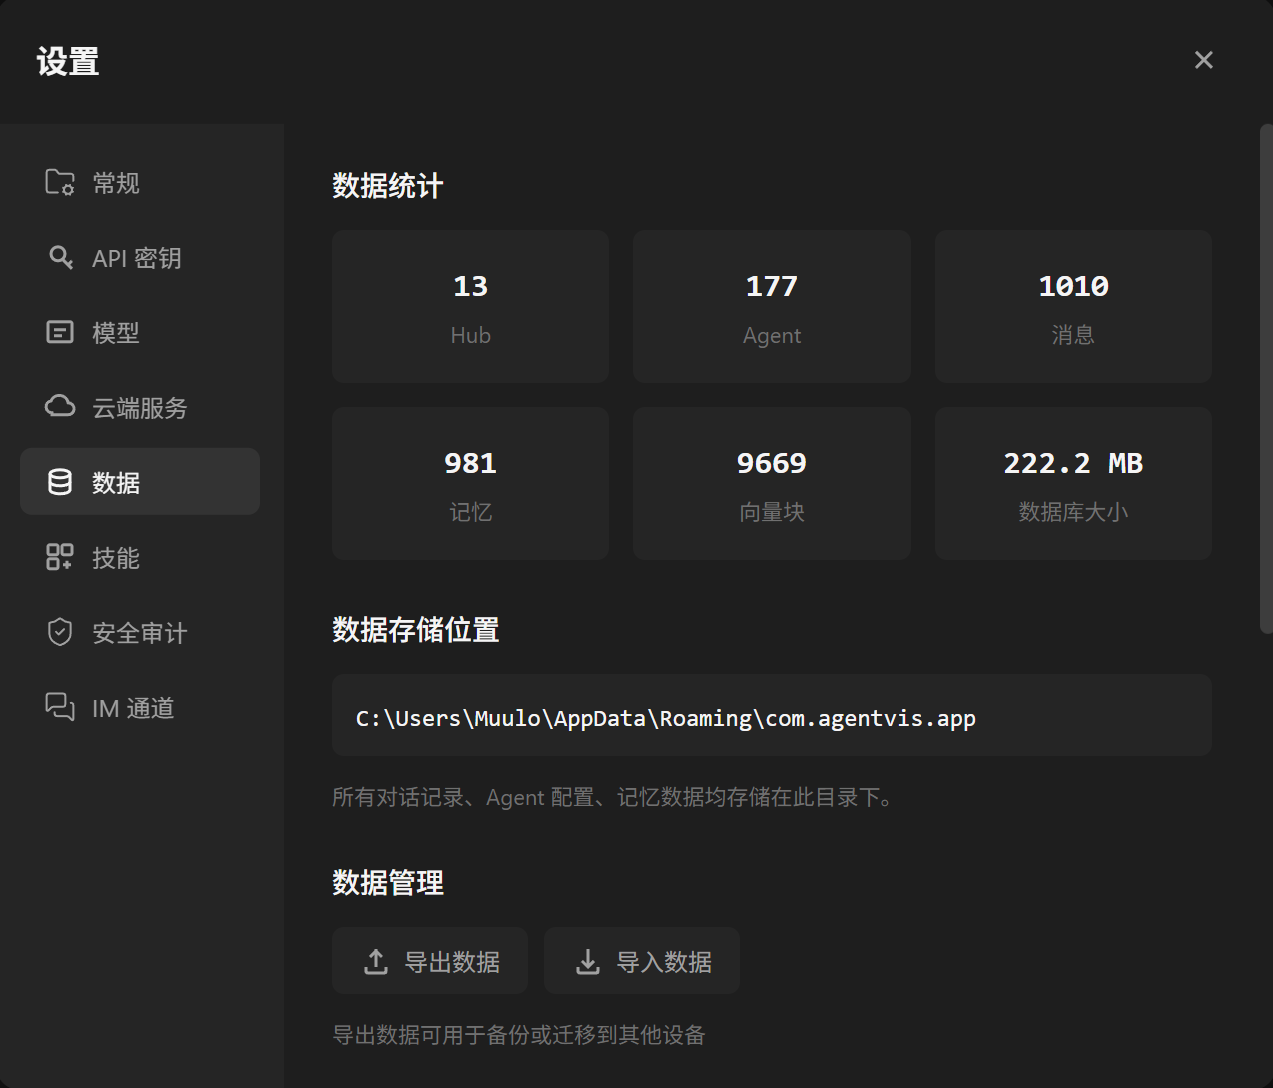
4.2 Backup, Restore, and Migration
"Settings -> General" also shows key application data stats. You can export data as a backup at any time, and import backups to restore data.
This helps when changing computers, reinstalling the system, or migrating AgentVis to another device. Before long-term use, try the export and import flow once.
5. Check Skill Dependencies
Open "Settings -> Skills" to view installed Skills, their types, enabled status, details, and dependencies.
After finishing onboarding and installing Python dependencies, most built-in Skills have their basic runtime requirements. Some Skills still need additional system-level tools.
AgentVis statically scans Skills and shows possible dependencies or risk hints in the details. We recommend installing dependencies in advance to reduce blocks when Agents use Skills. Agents usually try to install missing dependencies automatically, but preinstalling reduces instability from network failures or timeouts.
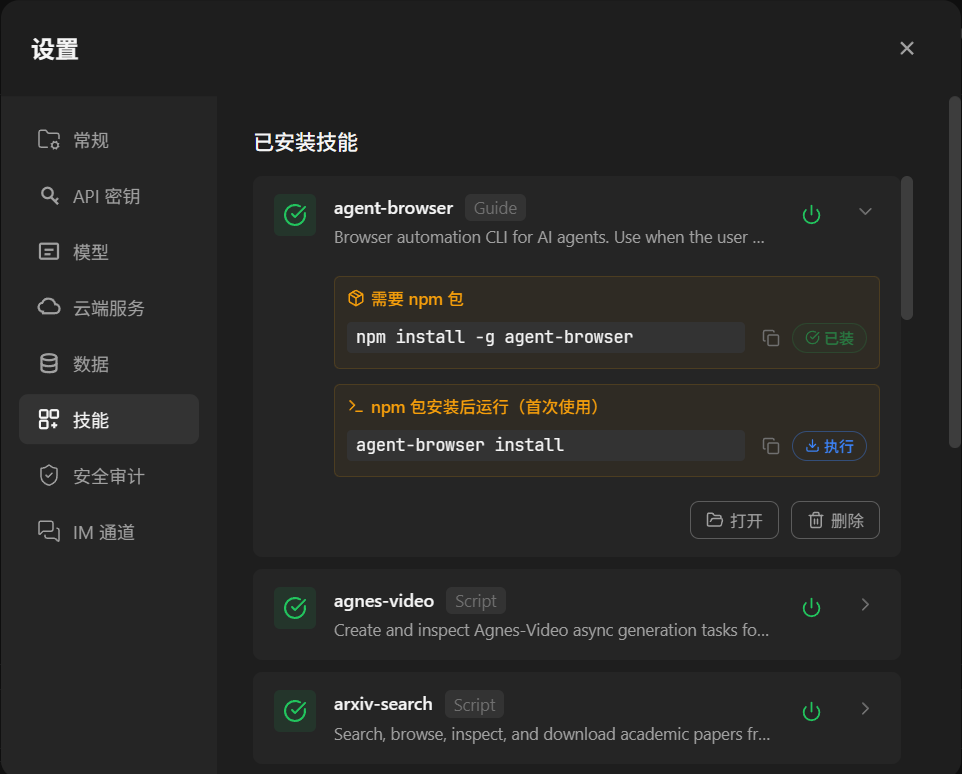
agent-browser requires additional system tool dependencies for browser automation.The most common one is agent-browser. If you need browser automation or built-in video production, open agent-browser and hyperframes-video, then install their system tool dependencies.
Some office-document Skills may also require system tools, such as the built-in docx, xlsx, and minimax-pdf Skills.
Before first using browser automation, video production, Office, PDF, or spreadsheet tasks, check the related Skill dependencies. When importing third-party Skills, read the security review carefully. After installing or modifying Skills, click "Refresh List" so definitions take effect.
6. Create and Configure an Agent
After creating an Agent, finish the basic capability setup before giving it complex tasks.
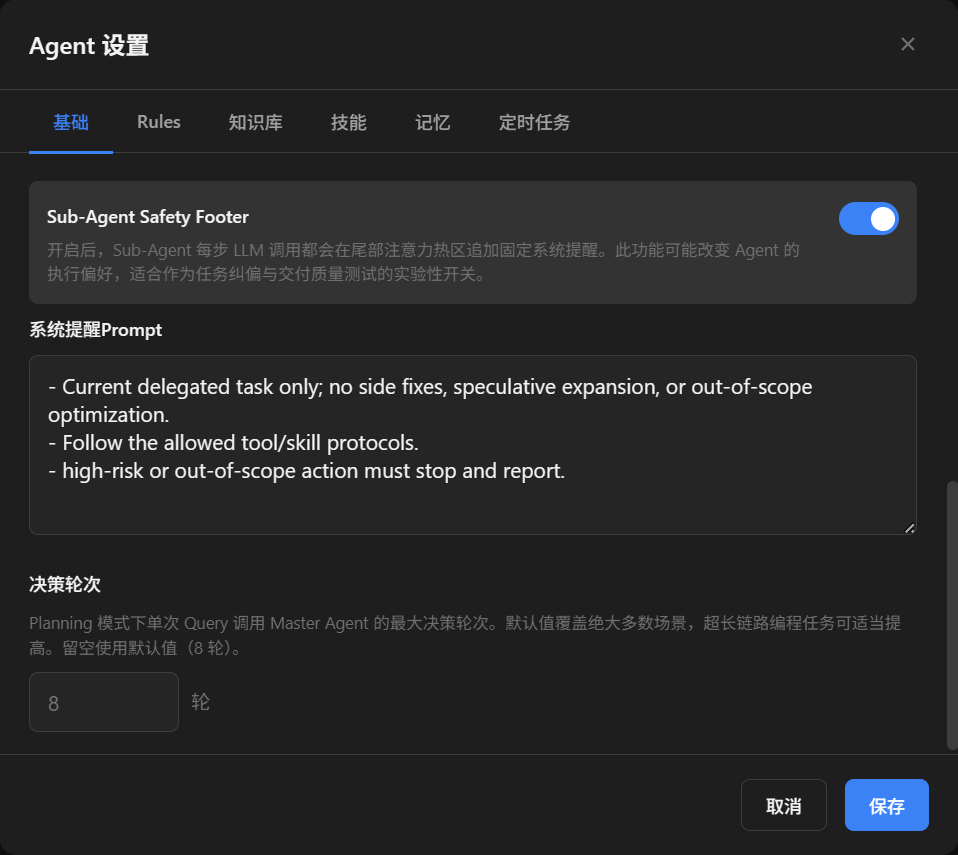
6.1 Basic Settings, Safety Footer, and Decision Rounds
Open "Agent Settings -> Basic" to adjust the Sub-Agent Safety Footer and Planning decision rounds.
Safety Footer is a fixed system reminder appended to the tail attention area of every Sub-Agent LLM call. When enabled, it continuously affects Agent execution preferences. It is an experimental switch for task correction, delivery-quality testing, or safety reminders. Most users can leave it off.
Planning decision rounds limit how many decisions Master Brain can make. The default is 8, with a minimum of 3 and a maximum of 20. More complex tasks may need more rounds, but higher limits also increase cost and waiting time.
6.2 Rules: Define Agent Roles and Behavioral Boundaries
Open "Agent Settings -> Rules" to configure prompts or rules separately for Planning mode and Chat mode.
Good content here includes the Agent role, output preferences, and behavioral boundaries, such as "frontend engineering assistant" or "give the conclusion first, then steps".
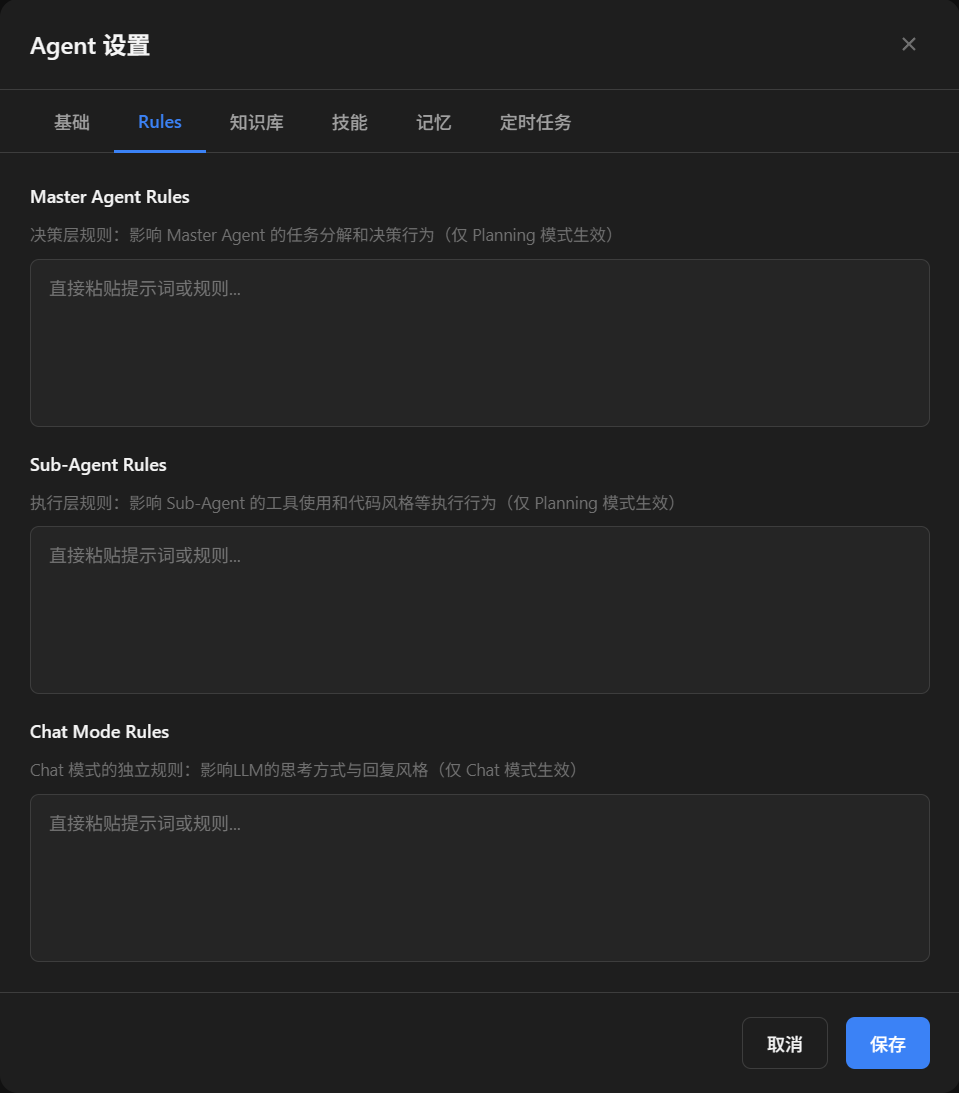
Start with short rules, then add more only when you notice drift during use.
7. Configure Knowledge
Open "Agent Settings -> Knowledge" to upload documents for the current Agent so it can retrieve and cite them during tasks.
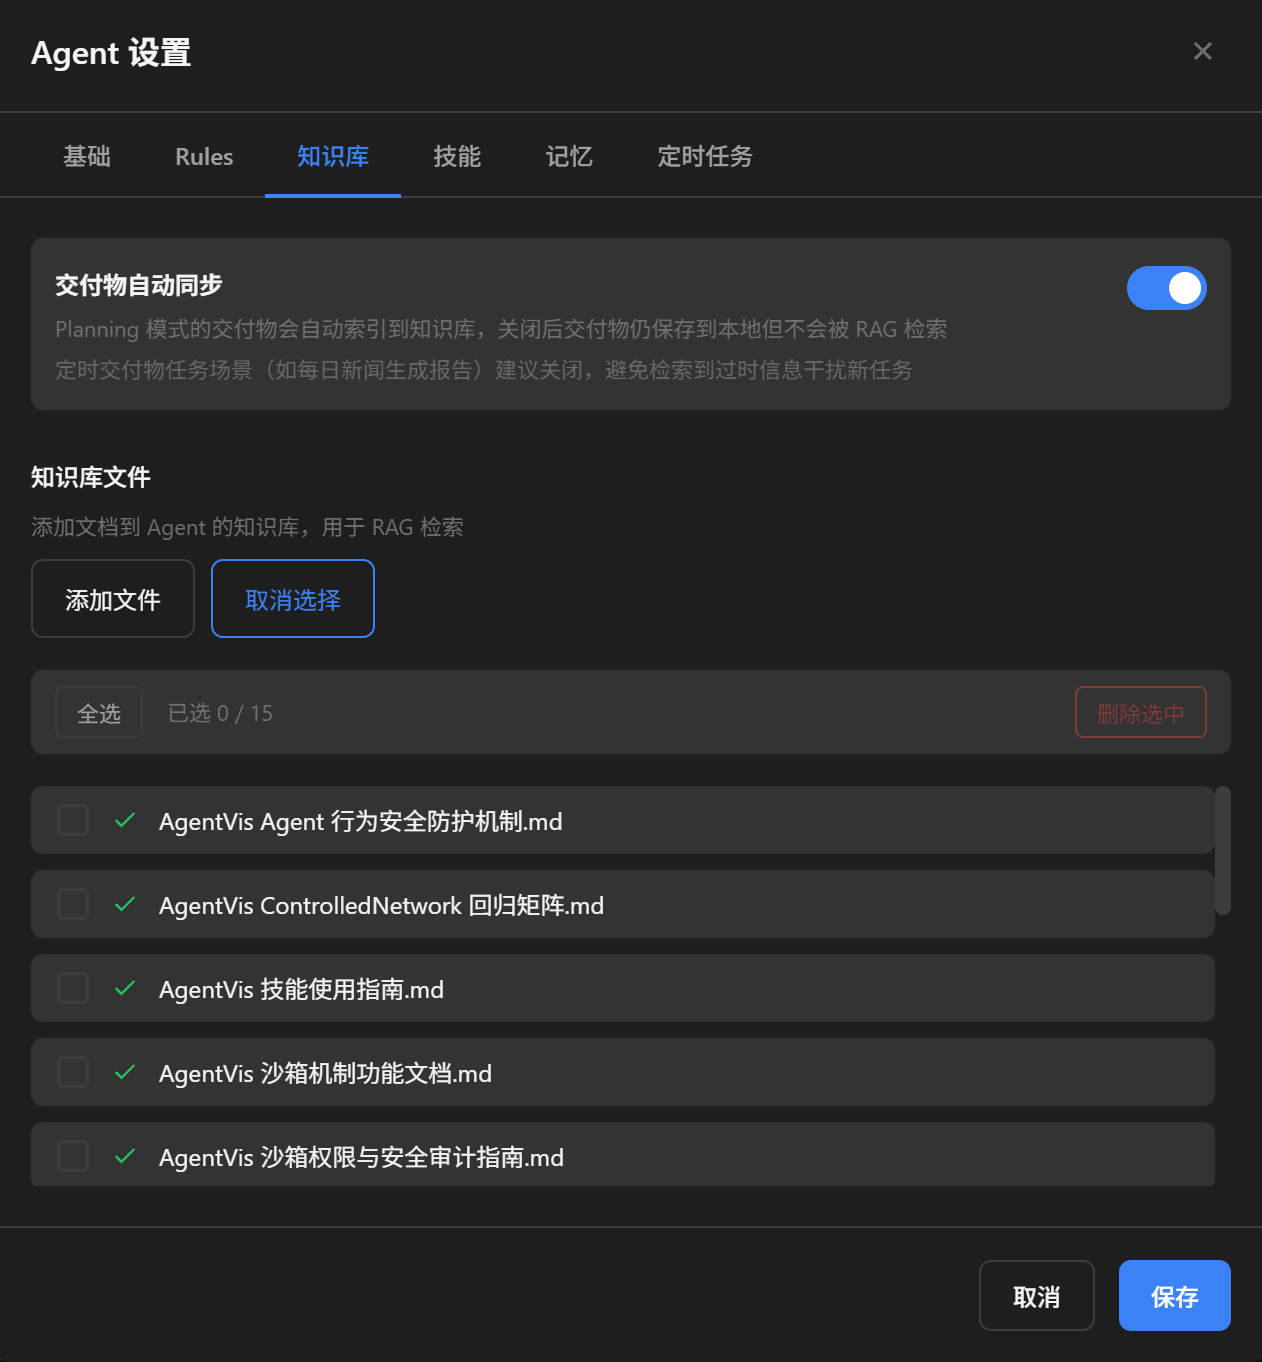
Knowledge supports batch upload and batch deletion. After uploading files, click Save; AgentVis uses the Embedding model to build indexes. When files are deleted, their vector data is deleted as well.
If you want Agents to automatically sync deliverables into Knowledge, enable or disable the related Auto-sync Deliverables option as needed. AgentVis RAG uses retrieval and filtering: in principle, relevant files are recalled and irrelevant ones are filtered out. Enabling it can improve memory of previous tasks, but tune it for your scenario. After changing Knowledge, test with a simple question to verify the Agent can cite materials correctly.
8. Configure Scheduled Tasks
Open "Agent Settings -> Scheduled Tasks" to view, create, modify, or delete tasks with different times, cycles, and content.
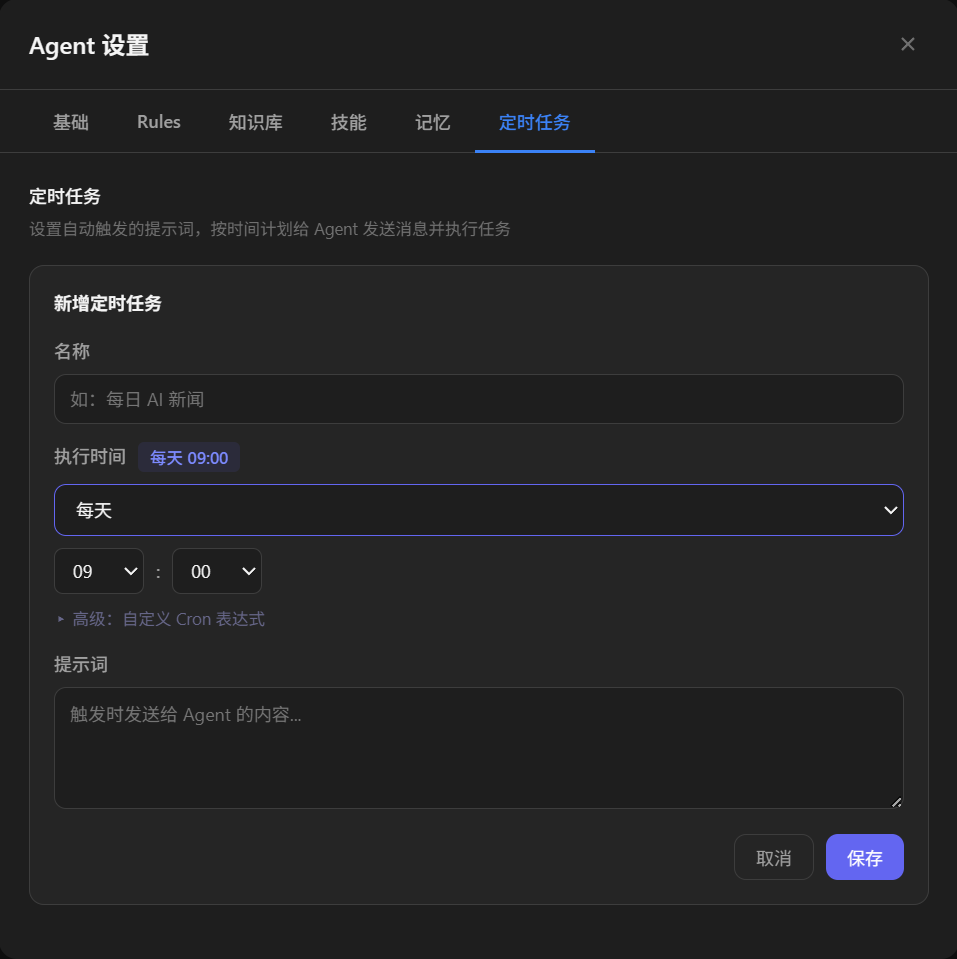
You can create Scheduled Tasks manually or ask an Agent in natural language. For example:
I have a meeting tomorrow at 2:30 PM. Send me a Feishu reminder a little earlier.The Agent generates a task plan from the description. After saving it, AgentVis runs it in Planning mode at the scheduled time.
9. Use Workspace Files and Project Directories
The AgentVis message input and right-side workspace both help Agents understand where task files come from.
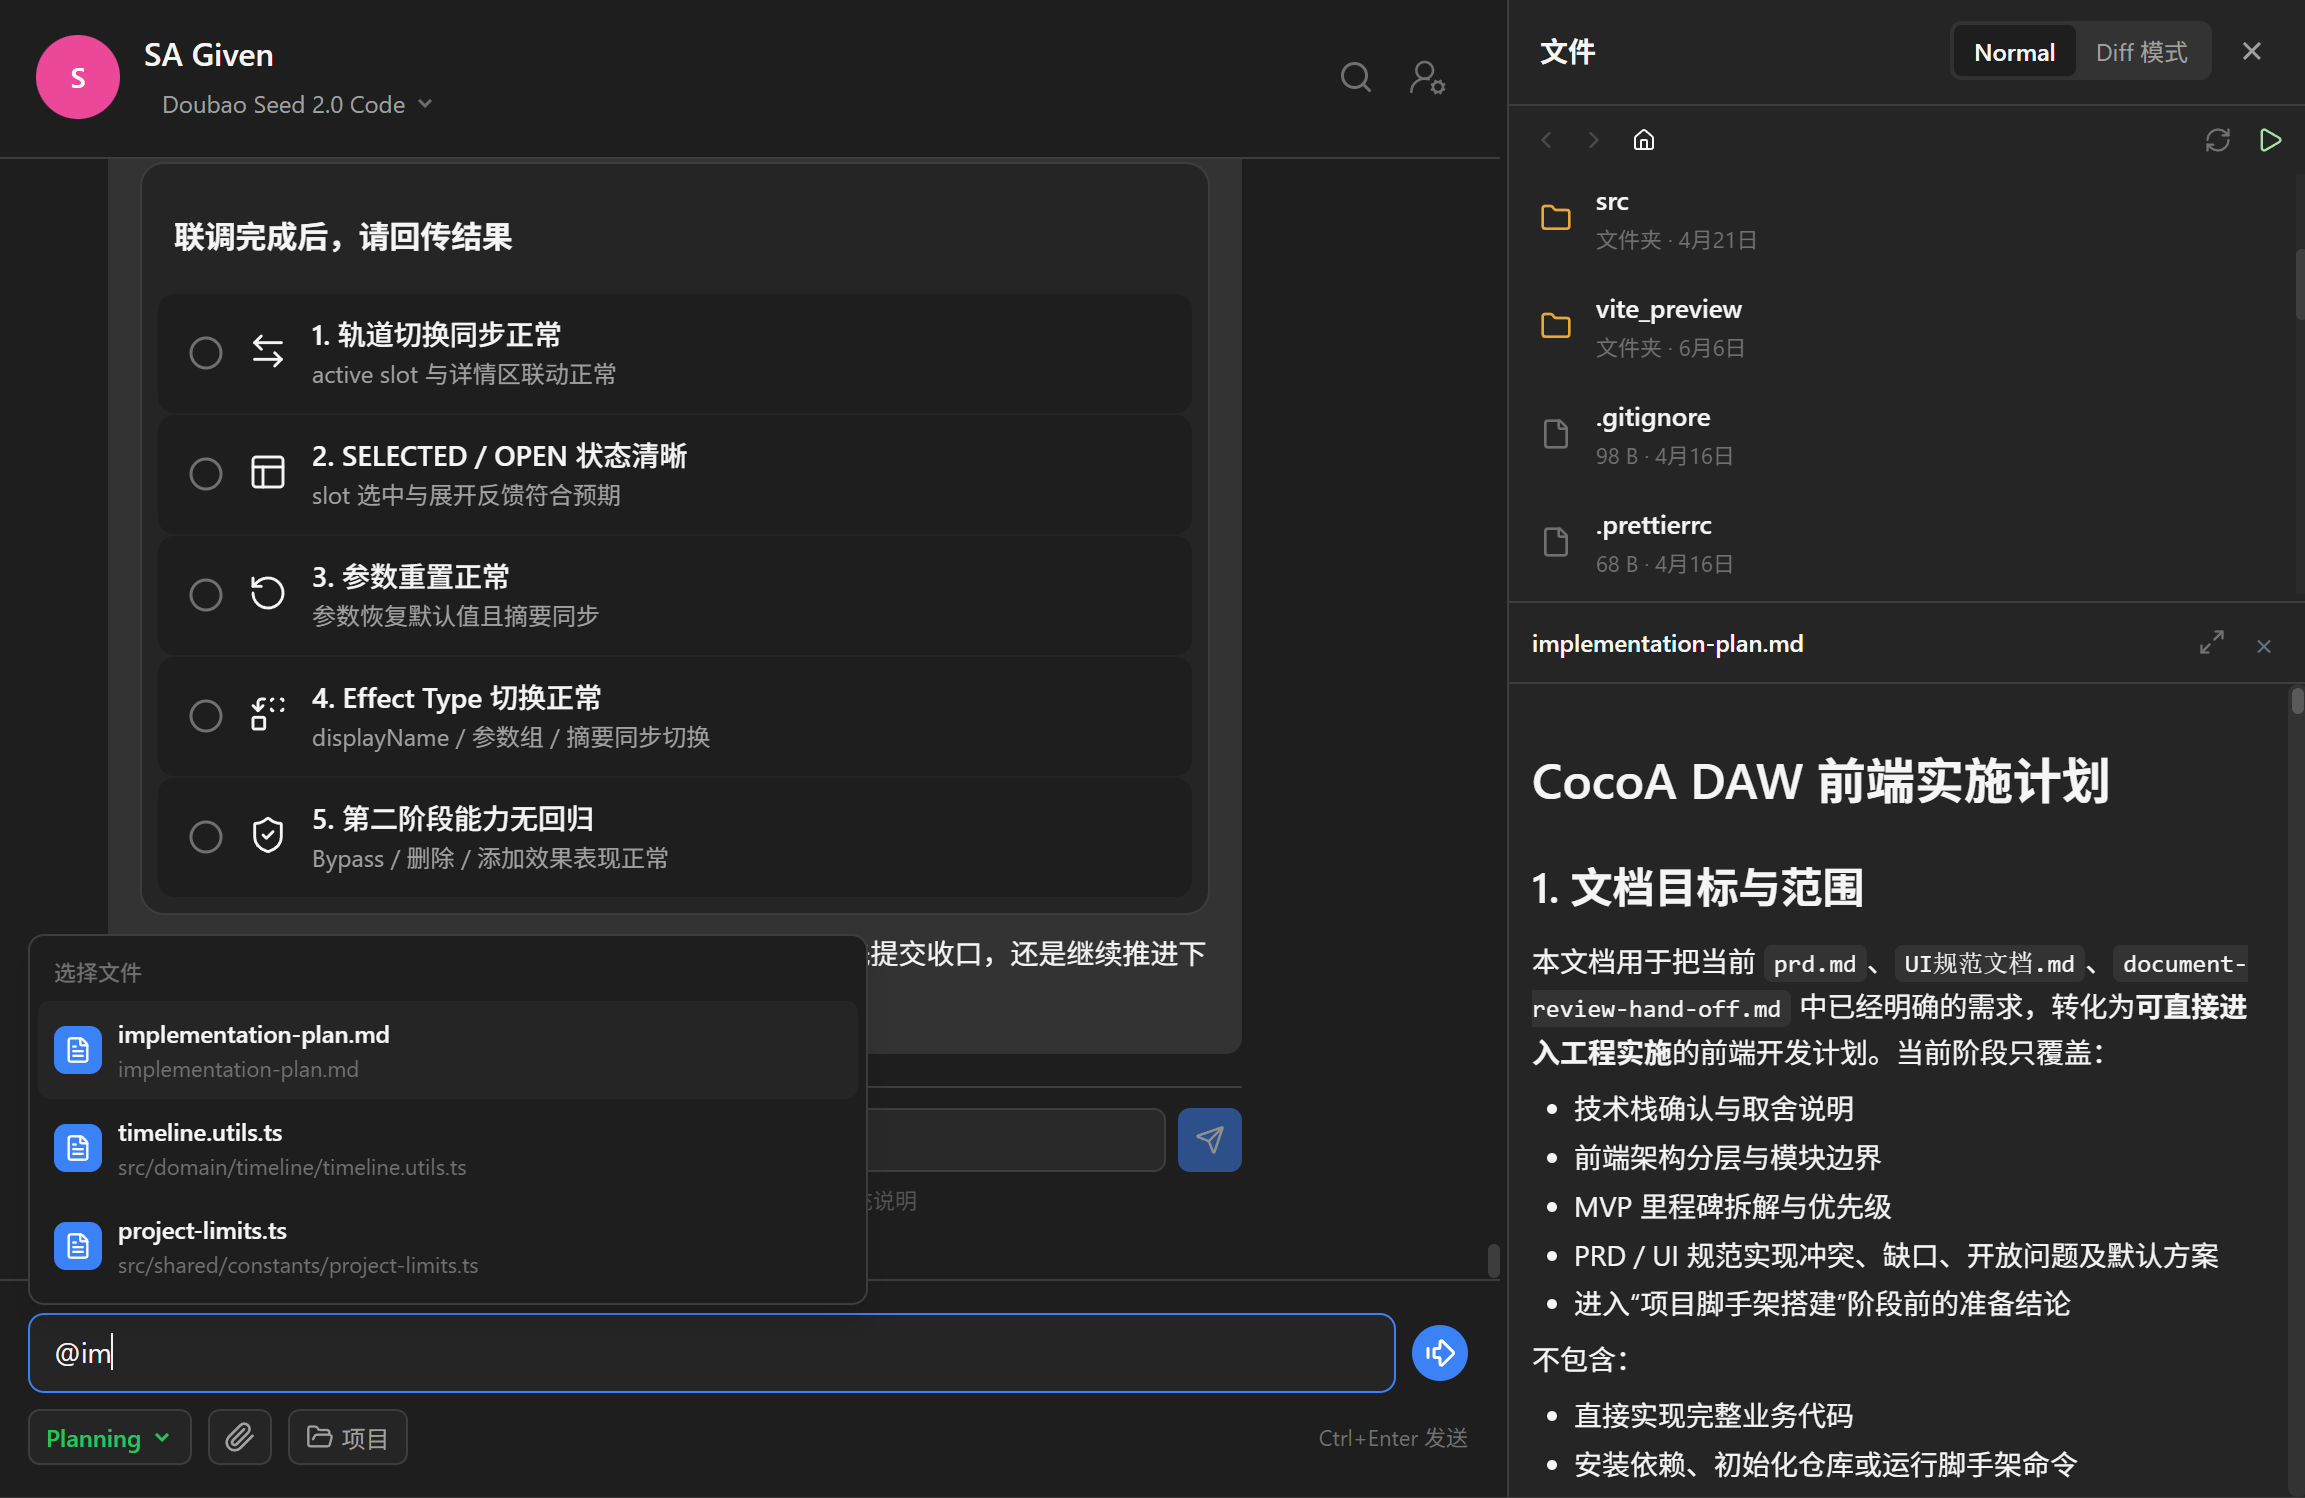
@ to reference files, drag in folders, or link a project directory so the Agent has clear work context.Type @ in the message input to show current workspace files. Enter a file prefix or full name to find and reference files precisely. For example, tell the Agent: "Please implement this according to the plan."
The right-side workspace lets you drag files or folders from any local path. You can also use the "Project" control below the message input to link a target folder. After linking, the Agent uses that folder as its workspace, which is useful for code, web, or document projects.
For the first trial, choose a low-risk test directory. Do not let the Agent operate directly on important production projects.
10. Recommended First Trial Task
After basic setup, verify the workflow with a low-risk task:
Please first read the file structure in the current workspace and summarize what this project does. Do not modify any files.If you have linked a project directory, continue with:
Please find how this project starts and tell me which commands I should run. Do not execute them directly; only give suggestions.After confirming file reading, model calls, and replies work, try command execution or file edits. For real file changes, prefer confirming through Diff review.
11. Quick Checklist
- API keys are configured.
- Default provider and model are selected.
- Embedding service and Memory System LLM are configured.
- Preset Skill Python dependencies are installed.
- Tavily is configured if web search is needed.
- Image service is configured if image generation is needed.
- Protected paths and Trash Bin location are understood.
- You know how to export backups for important data.
- Common Skill dependencies are checked, especially
agent-browser. - The Agent has Rules, Knowledge, or Scheduled Tasks configured as needed.
- Workspace files or project directories are linked correctly.
- The first task starts as read-only and low-risk.
12. What to Read Next
- AgentVis Skills Guide: learn Skill installation, enabling, binding, and troubleshooting.
- AgentVis Sandbox Permission and Security Audit Guide: understand Local Audit, Controlled Network, Offline Isolated, and Security Audit.
- IM Bot Configuration Guide: configure Feishu or Slack bots so IM messages trigger Agent tasks.